
Fundraising Made Easy: A Guide for Assistive Technology Grants
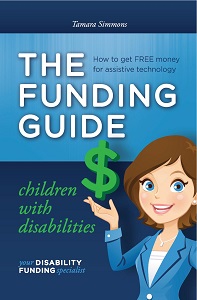
When preparation, organization and creativity are combined, great outcomes are sure to abound. Just ask Tamara Simmons, the author of The Funding Guide for Children with Disabilities, a book that guides parents and guardians of children with disabilities through the process of requesting grants and funding.
Though the idea of finding and applying for assistive technology grants may seem daunting, Tamara breaks the process down and offers simple, insightful steps on everything from researching the right funders for your specific need, to how to stand out as an applicant.
Featured below are excerpts from The Funding Guide for Children with Disabilities for seeking funding.
The Simple Steps to Funding
To prepare your funding plan, read through this section and follow each step. Don’t skip any of the steps; they are all very important in the process.
Once that is done, go through the Funding Source Directory featured later in this book and find the best fit for your situation, or do a Google search for additional funders as there’s far more than I can include in this book.
In order to be successful, you need a good funding plan. If you follow all of the steps listed below, you will have a great funding plan!
I highly recommend taking the steps in the order listed. This will ensure that you keep the process moving along, which will ensure you reach your goal.
Step 1: Determine what assistive technology you need
What is the item you need that will help you/your family by increasing your independence, physically, socially, academically, recreationally or vocationally. Where can assistive technology assist you in any of these categories? This will determine your need.
Step 2: Get a cost estimate for what you need
You need to get a cost from the service or equipment provider. This can be done by requesting a price quote. It is common for a Funding Source to require a discount, so when you call for the quote, let the store know you may be purchasing the product through a funder and ask if they will offer a discount. Most of the funding sources are 501(c)(3) organizations and require a discount to provide funding.
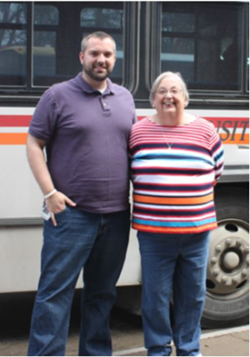
Step 3: Take a picture of your child with the item you are requesting funding for
The best part of your ask letter will be a picture of your child on or with the assistive technology device. What your child needs may not always be a device but could be a service such as Horse Therapy. Having a photo of your child participating in a session with the horse, for example, would be the best thing you could put in your ask letter. You want this photo to show what this device or service means to your child; that photo says more than your words could ever convey.
Step 4: Get a letter of medical necessity
It is always best to get a letter of medical necessity from a physician. If you are not able to do that, you can get one from a therapist or teacher. This letter will determine why your child needs this assistive technology or service. I have included a sample of an often-funded letter of medical necessity in the appendix; just fill in the blanks with your pertinent information.
Step 5: Gather important documents for your applications
You will need to gather certain important documents that some funders may require. Every funding source is different; some require additional financial documents and others don’t require any documents. I would put copies of the items listed below in my file:
1. Previous year’s W-2’s
2. Most recent pay stubs for each parent
3. Copies of insurance information for your child
4. Medical History Sheet including diagnostic codes, list of surgeries, etc.
Step 6: Submit the item needed and price quote to your insurance to get denial letter
You will want to get this denial letter as soon as you have all the documents needed to submit to your insurance. Most often the assistive technology or service you request is denied by your insurance (if it wasn’t, there really would be no need for my funding manual to help families). It usually takes some time to get a response, so get this step done as soon as you have all of the documents gathered. Some funders require a denial, others don’t, but the best funder match you decide to apply to may need it. You want to have it in place when you apply, so always get that letter just in case.
I would suggest calling your insurance company before you submit anything and explain what you are doing because they may suggest the best way to submit your information in order to get a denial letter more quickly.
Step 7: Write a high quality ASK Letter
To me this is THE MOST IMPORTANT STEP; please take your time here. You don’t have to be a writer; you just need to tell your child’s story. Pull at their heartstrings with this letter. You want it to go to the top of the pile. Be honest; don’t hold back. Most of the people you are requesting financial assistance from have a funding program because they want to help where there is need. They are there to help you; but you’re not the only one who needs assistance. Often these organizations have more people asking for help than they can support, but don’t let that deter you. It really is easy to get the money, just tell your story and clearly show how much their funds would change your child’s life. It really does work.
Step 8: Research funding sources to find the best match for your child
Now the fun part, well maybe not for you, but this is the part I like best: finding the perfect fit! A perfect fit can be determined if they give money for what you need, for where you live and for your child’s specific disability. That is a perfect fit. If they don’t give money to people who live in Illinois and that is where you live, that is obviously not a good fit. Look at the geographic location where they fund first, then see what they fund.
Step 9: Call and talk to the funders that you select
I tell everyone I work with, “It is extremely important to call the funders and ask any questions you may have.” I also tell them, “Even if you don’t have a question, come up with one. It can’t hurt for them to have heard your name, so always call a funder if you can.” Now keep in mind, not all funders want a call. Out of all the funders I have worked with in the past, only one I know does not want calls from any of the families, but very seldom do the funding sources say “don’t call.”
Step 10: Complete any forms required by the funder
Some of the funding sources have their own application. Please use it exactly how they have it laid out. Do not change the order of their questions. If a question does not apply, never leave it blank. Put N/A (not applicable), that way they know you did not miss a question. All of the funding sources listed in this manual will have the application included with their information if they have a form you need to fill out.
Step 11: Make sure to follow up with funder after 30 days
I always follow up with a funding source if I have not heard back within a month. Most of the funding sources in this manual meet once a month or on a rolling basis. If you have not received a response in a month, I would call to check in and see if they need anything else.
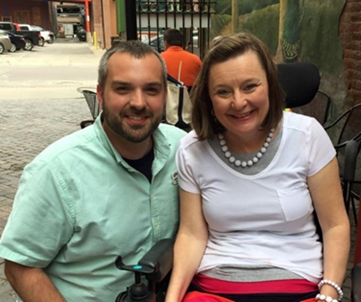
Step 12: If you are funded, send a Thank you letter!
This Twelfth Step is almost as important as Step Seven. You must send a Thank You to the funder. I can’t tell you how many times I have heard from funders that they never got a thank you letter. They understand most families with children with disabilities are busy and often overwhelmed, but the thank you is not for them, they want to give it to the donors who give them the money to give to you. This is SO VERY IMPORTANT! Not only send a thank you, but send a picture of your child with whatever it is they funded for you.
Step 13: If you get a no, go and get a YES.
If you get a “no letter,” don’t give up. You will get some no’s, but you will get a YES if you keep at it, just ask someone else! Be sure to also send a thank you letter to those who have taken the time to review your application and send you a “no letter.” This may seem superfluous, but they will remember those who thanked them regardless of the decision and you may want to reapply someday.
Tammy’s Time Saving Tip: When working on all these steps, it is very important to have an accordion file to keep track of all your important documents such as tax forms, pay stubs, etc. Keep additional copies of each in the file so you can quickly send in multiple applications.
Want to know more about funding? Check out these articles:
Check out the services, technology and experiences grants can provide
Read to find out how you can make applying for grants easy

Support & Education
Our Blog
-
Navigating Through the Red Tape: Disabled Veterans and Financial Wellness
Wednesday, May 1, 2024, 11:48 AMNavigating Through the Red Tape: Disabled Veterans and Financial Wellness
Wednesday, May 1, 2024, 11:48 AM
Earlier this month, Easterseals visited Washington D.C. to meet with representatives and share ways …
Read this Post -
Communities Making Accessible Transportation: How We Can Work Together
Monday, April 15, 2024, 10:56 AMCommunities Making Accessible Transportation: How We Can Work Together
Monday, April 15, 2024, 10:56 AM
By Jeremy Johnson-Miller “How did you get here today?” For many, this may never be a second thought,…
Read this Post -
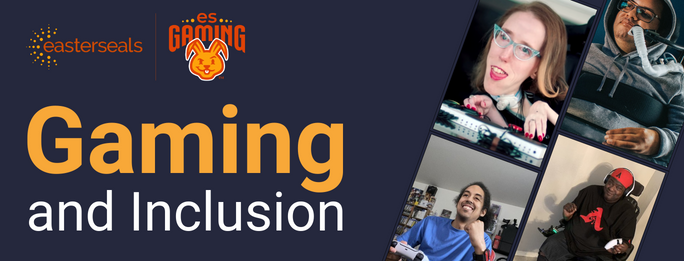
Level Up: Disability Employment in Gaming
Tuesday, April 2, 2024, 11:11 AM
By Grant Stoner As a medium, video games allow us to remain connected. Whether it’s long-distance re…
Read this Post

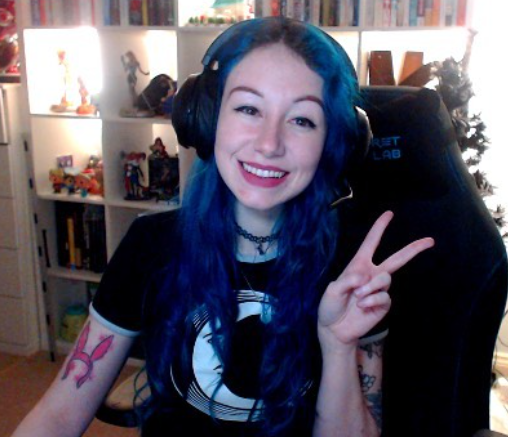 “Streaming is both accessible and not accessible,” Evans said. “The streaming part itself is accessible, in that it allows me to make my own schedule, and I can work it around my disabilities. However, the inaccessible part is the demand for content creators to constantly be networking, attending events and continuously pushing out content. I cannot attend events, and if I can they’re incredible stressful, so all my work networking has basically been done online, which thankfully is becoming a more acceptable side of content creation.”
 “I must say over the years it has become less and less accessible for me,” Martínez said. “SMA (Spinal Muscular Atrophy) causes strength, endurance and mobility loss as time passes. I can’t use a physical keyboard as I used to, so it’s been years now with an on-screen keyboard. Voice dictation doesn’t work well for me due to my voice being inconsistent, not to mention my accent. In English it can go from totally wrong to acceptable. In Spanish, my native language, it works better.”
 “What drew me to consulting was the opportunity to leverage my unique perspective as both an able-bodied and disabled gamer to improve the gaming experience for others,” Lane said. “I can share the frustrations I’ve faced as a disabled gamer and use that knowledge to advocate for better accessibility features. Companies and studios that I work with go the extra mile to make sure I have everything I need to succeed.”


Connect with us on social media